

Introduction
All these last years, I used Backblaze backup to back up my computer (I have one mac and one Windows PC). I backed up only my Mac because $10/month to back up one computer was enough for my wallet. What I loved with Backblaze is that it's a continuous backup, encrypted, and I have from one-year history to unlimited. It works in the background pretty well, and it has a simple but effective UI to browse and download my files from the backups.
Searching for a solution
But I wanted to save some money, so I asked myself if there is a similar way to back up my Mac for a cheaper cost. I have a Microsoft 365 subscription for my personal and professional needs, and it includes a 1To OneDrive space. But I'm using like 30Go, so I was considering using this space to back up my Mac and PC and my personal Linux server.
As you may see in another article, I'm already using Restic to back up my Linux server.
So I wondered if I could use Restic to back up everything, but with a little fancy interface. On my journey searching for a new backup solution using Restic on Google, I found Backrest.
Refining my idea
So the idea was to use Restic (via Backrest) to back up my computers and server on my OneDrive for free (well for free isn't really accurate, “with no additional costs” would be preferable). I misled you, dear reader, searching for really free backup solutions, and for that, I’m truly sorry. My solution is not technically free but shouldn't add any cost to you. 71% of the Americans use some cloud storage, with Google Drive (~40%), iCloud (~33%) and OneDrive (~20%) being the most common. Studies suggest that most businesses allocate storage capacity heavily (often to avoid surprises) but actually use only 20–25%, leaving 75–80% unused. I didn't find any numbers for individuals, but I guess there's some free space everywhere.
And is it good enough for backup storage, could you ask?
Well, in the backup world, most of the backups or made using S3 (a remote, almost unlimited, very resilient and secure storage). And I wanted a solution offering almost the same benefits. As I said, I'm using OneDrive, and Microsoft has a strong data resiliency policy. This policy is almost as good as most S3.
Installing the software
Backrest is a free and Open-Source software. You can download it from their GitHub repository.
It relies on Restic, another free and Open-Source software.
We will need to use Rclone too, a software allowing Restic to back up on OneDrive, Google Drive, iCloud Drive etc.
First, you can download the latest version of Restic, Backrest and Rclone.
If you're on Mac, you can use Brew:
brew install restic backrest rcloneIf you're on Windows, you can use chocolatey (only for Restic and Rclone):
choco install restic rcloneIf you're on Linux, you shouldn't use APT or so because you will install outdated versions. Please download Restic and Backrest from their respective GitHub repositories.
You can download Backrest from their GitHub releases page: https://github.com/garethgeorge/backrest/releases
Once you installed Backrest, wait before going on the webpage, we'll configure it later.
Here is how all these programs will interact:
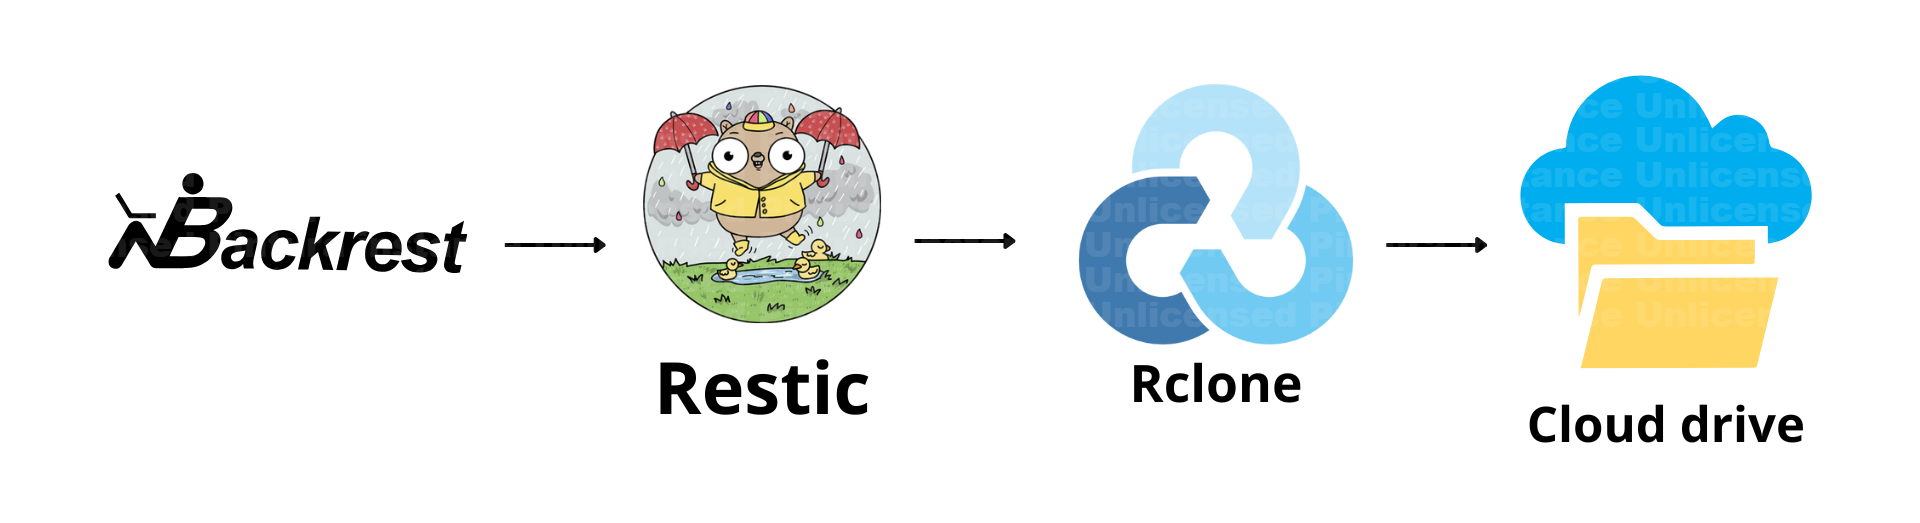
Backrest is just a GUI for configuring Restic. Restic does the backup and manages its backup repository on the cloud drive thanks to Rclone, because Restic doesn't natively support those cloud drives.
Rclone configuration
Now it's time to configure Rclone to work with your drive. Go on https://rclone.org/ then click on “Storage Systems” then click on your storage system in the list.
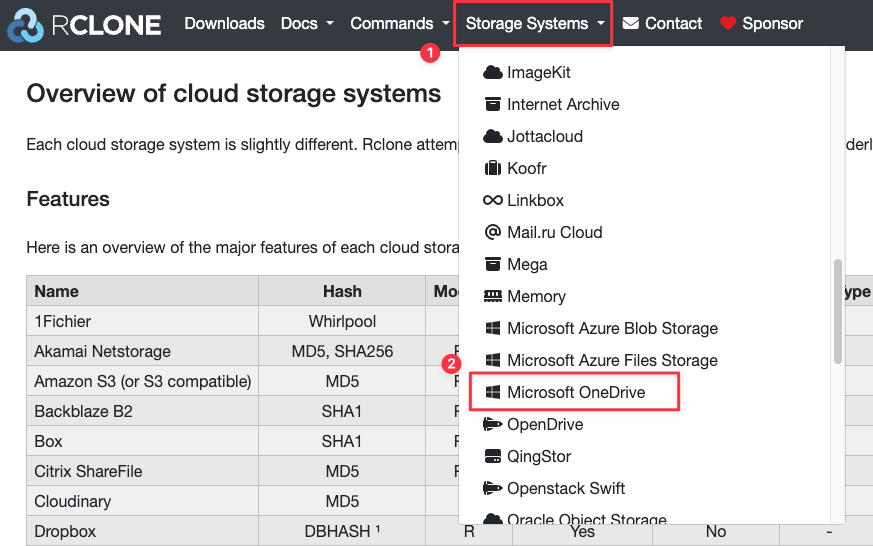
Then you will have a “Configuration” section you have to follow depending on the storage system you chose.
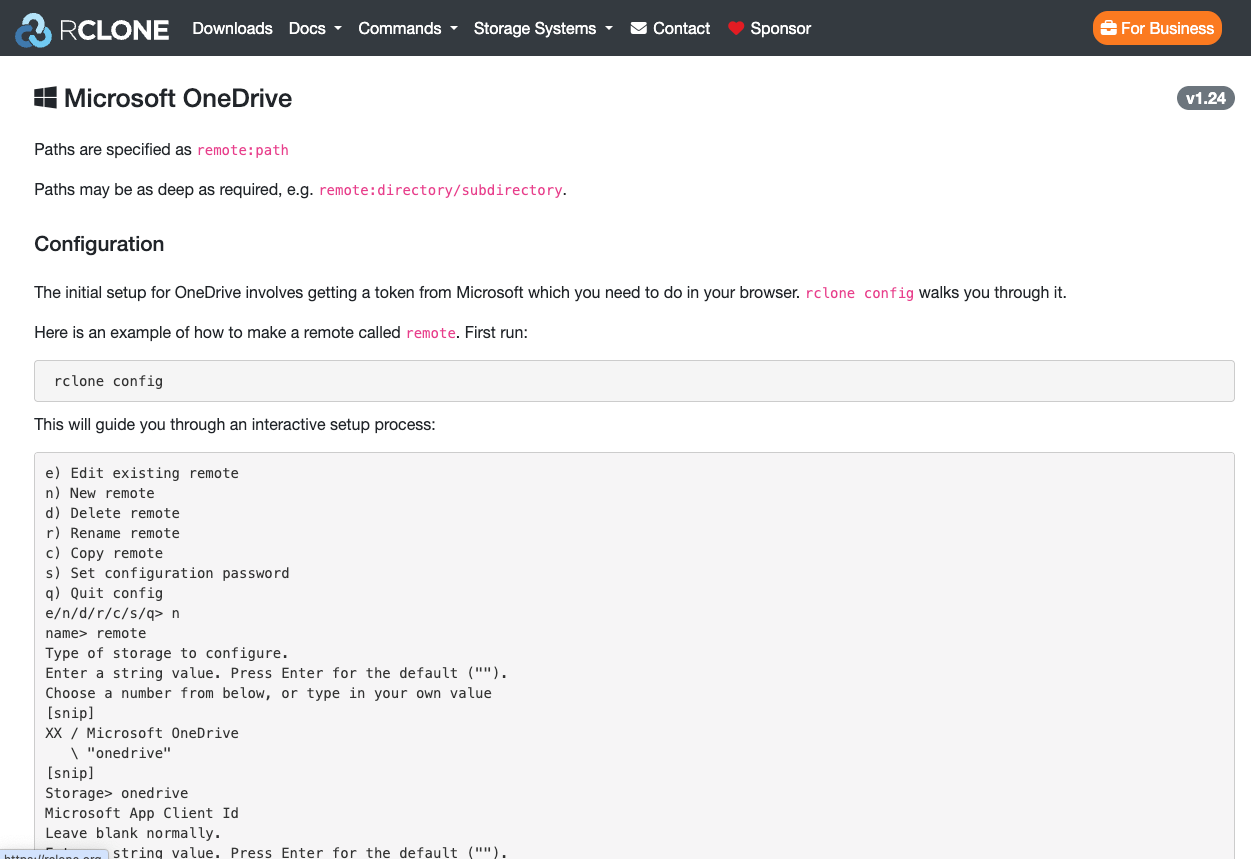
You can start doing rclone config and then following the guide. Please set a simple remote name with [a-zA-Z0-9-] only, as it's easier to use in Restic later.
In my case, I named my remote “onedrive”:
rclone listremotes
onedrive:
So now, I will just create a “Backups” directory where I will store all my backups.
rclone mkdir onedrive:BackupsNow, I will create a subfolder for every computer I want to back up:
rclone mkdir onedrive:Backups/Mac
rclone mkdir onedrive:Backups/Windows
rclone mkdir onedrive:Backups/MyLinuxServer
Now we can configure Backrest to use this remote and make the backups.
Backrest configuration
Repository configuration
Now you can go back to Backrest: http://localhost:9898
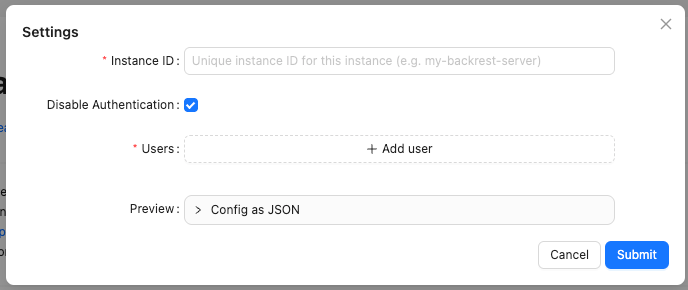
First, it will ask you to configure the instance ID and the authentication.
I named the instance ID mac because I have only one mac, but be sure to set a unique name.
Regarding the authentication everything depends on you and your environment. By default, the “Disable Authentication” checkbox is checked. That's because If Backrest is installed on your local machine and will be accessed only from your local machine, you don't need authentication, that's like a local software, it doesn't ask you for credentials every time you open it. But if you're using an untrusted computer or planned to use it remotely (from a server, for example), you can enable authentication.
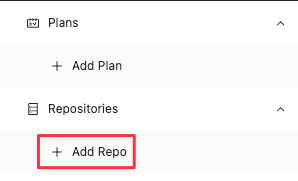
Then submit and click on “Add Repo” on the left menu:
And let's configure the backup repository:
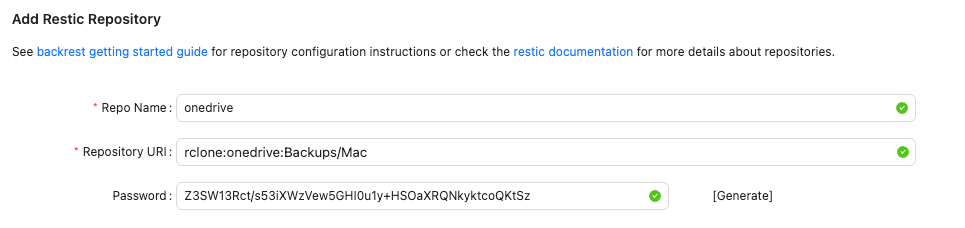
The repo name can be whatever you want as long as you understand what it is. I set the same name as the Rclone remote.
Repository URI must be the form rclone:[rclone remote name]:[Backup directory]. So in my case the Rclone remote name was onedrive and the backup directory for my Mac was Backups/Mac.
The Password is for the repository encryption, you can click on “Generate” to generate a secure one. Because, of course, we want our backups to be encrypted. So the must important is: Don't. Lose. It.
I put the repository password in 1Password, and you should do the same (or in whatever password manager you use).
Backup configuration
Now let's configure the backup.
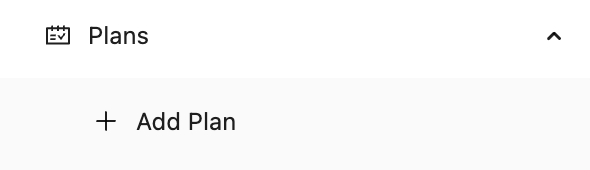
Click on add plan:
Then configure your backup plan:
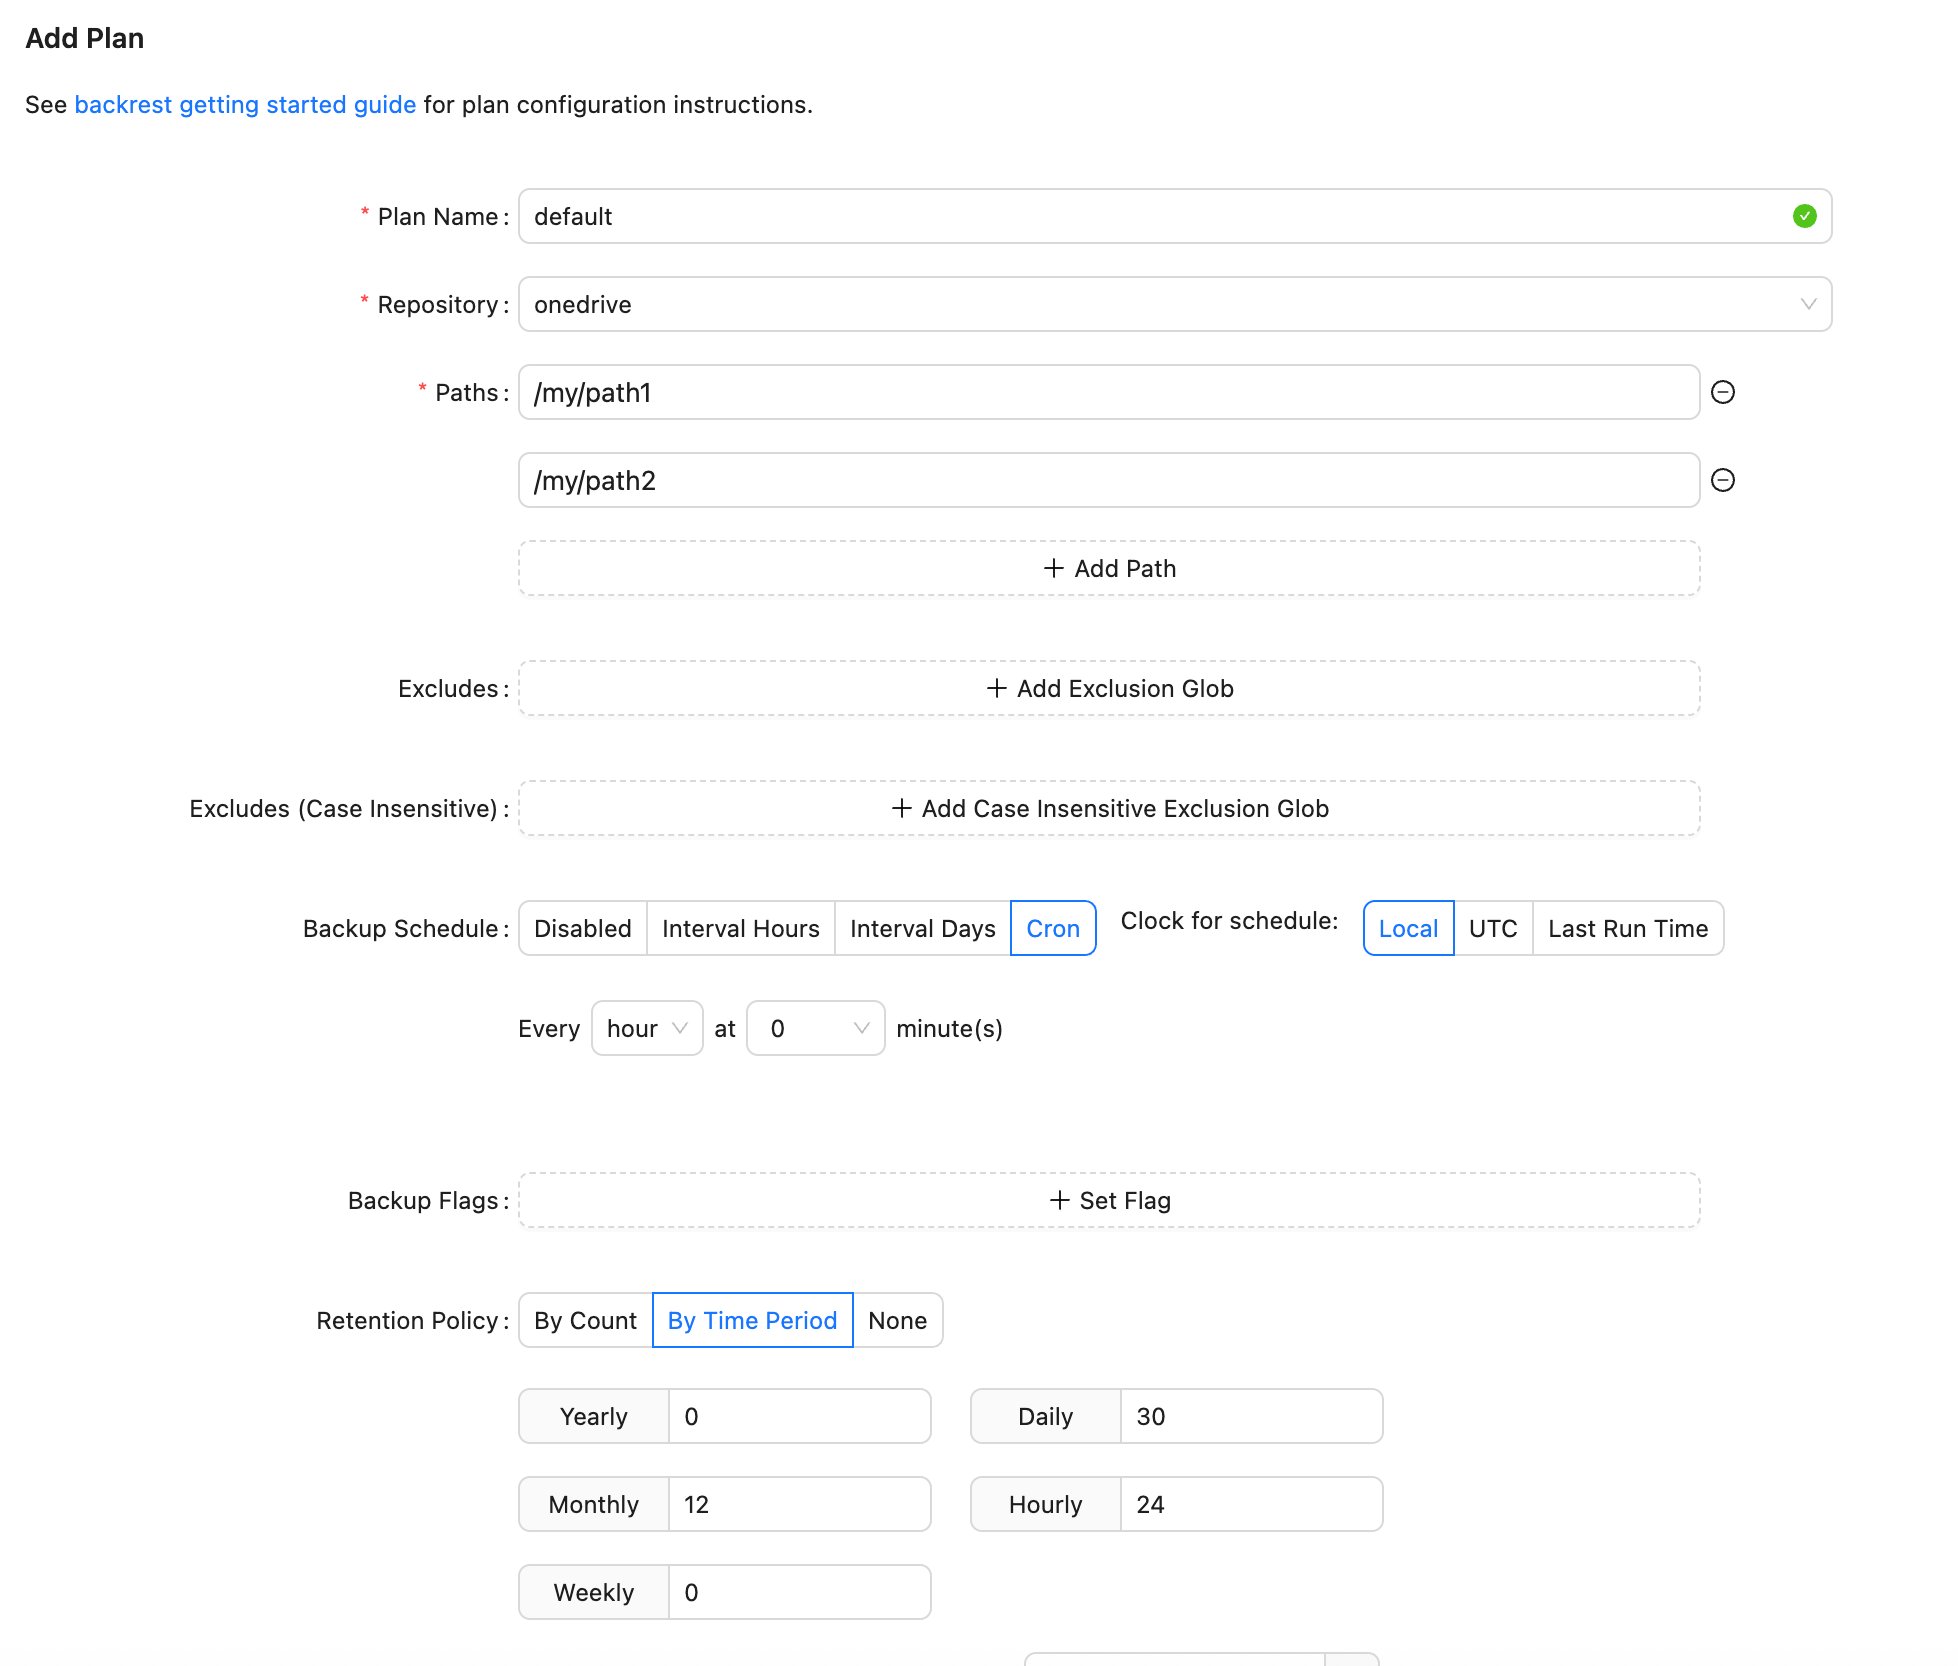
- Plan name: set whatever you want
- Repository: select the previously created repository
- Paths: Set the different paths you'd like to back up
- Excludes: If you like to exclude some paths from the backed up paths, set them here
- Backup schedule: Set whatever schedule you want, I, personally, set 1 hour interval.
- Backup flags: You can set flags on the backups to specify what you're backing up. For example, you can create a backup with a flag “photos”, another with “work files”, etc. to distinguish them more easily.
- Retention policy: I like to use the default one. Keep in mind the backups are incremental, so I won't take much space as long as you don't use too much new disk space every hour.
- Hooks: You can set some hooks if you want to be notified in case of errors or so.
Click submit, and then you can force start your backup to run now to test if everything runs fine or just wait for the next backup:

Don't worry, if a backup is running, it won't run the scheduled one. Two backups can't be run at the same time.
Conclusion
Remember, you can run this on every OS and even on your Linux servers. You can use only Restic and Rclone if you would rather not set up Backrest every time, but that's a good way to monitor.
Backrest only handles backing up and not restoring from snapshots. To restore easily, you can use Restic browser to browse any Restic repository remotely: https://github.com/emuell/restic-browser
You can't run this on a headless server as it's not a web app, but you can restore easily any snapshot from the CLI by reading the documentation.
Feel free to comment if you have any question or spotted anything wront.


Discussion